Introduction
Partitioning your SSD is like organizing a messy drawer – it’s easy to lose track of important files when everything’s piled together. But don’t worry, it’s not as complicated as it seems! In this guide, I’ll walk you through the simple steps to partition your SSD, helping you organize your storage, improve performance, and keep everything in order. Let’s get started and make your digital space more efficient!
What are the Benefits of Partitioning an SSD in Windows?
Imagine having a section just for your games, another for important computer things, and maybe one for your schoolwork. It’s like organizing your closet but for your computer. And guess what? It makes your computer run better. Especially if you’re dealing with Windows 10 or 11, partitioning helps a lot. If something goes wrong or you need to fix your computer, having these separate sections makes it way easier. If you ever need to reinstall your operating system having a separate section just for it makes the whole process super smooth. It’s like having a backup plan for your computer.
Step-By-Step Guide for Partition of Your SSD in Windows 10 /11
Note: Before performing a Disk Partition, We recommend you Back Up your Data as a precaution in case of process failure.
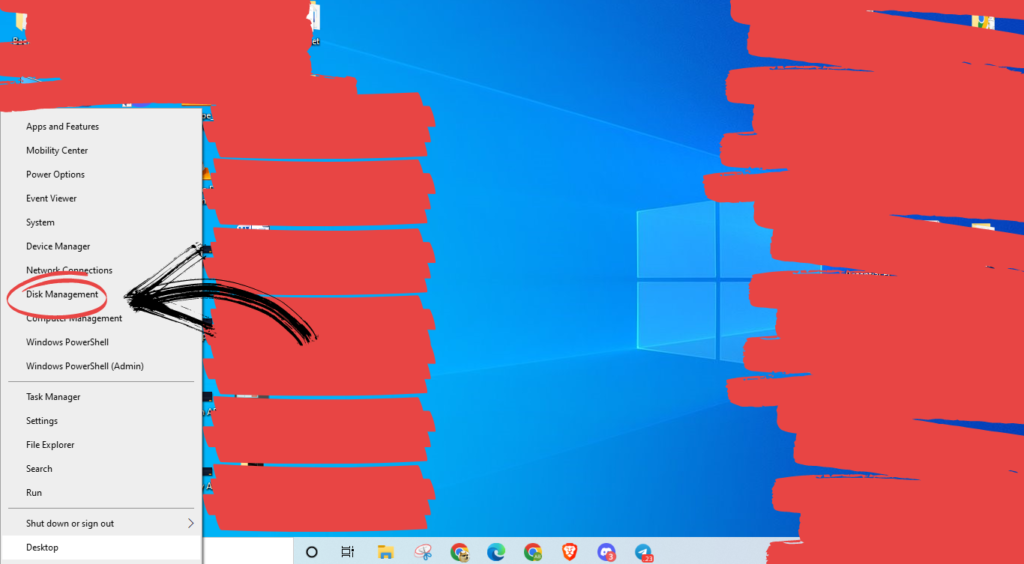
Step 1: Open Disk Management
Disk Management in Windows is your trusty sidekick for organizing the storage on your computer. It’s like having a personal assistant that helps you view, tweak, and sort out all your important files and drives. Whether you’re dealing with hard drives, SSDs, or those external buddies, Disk Management has your back. This tool lets you create, delete, and format partitions with a few clicks. It had also a neat graphical layout that showed you exactly what’s where. Follow the Steps Given Below:
- Right Click On Windows Icon
- Select Disk Management
Step 2: Inspect the Condition of your SSD(Solid-State Drive).
After opening Disk Management you should know the components in the Disk Management before performing disk partition.
- Unallocated(Black): It means your SSD is initialized, so you can now easily create partitions on it.
- Not Initialized(Black): If you have just installed a new SSD then you need to initialize the SSD in Disk Management.
- Partitioned: This indicates that there is an existing partition on the SSD, and you must resize and repartition the SSD.
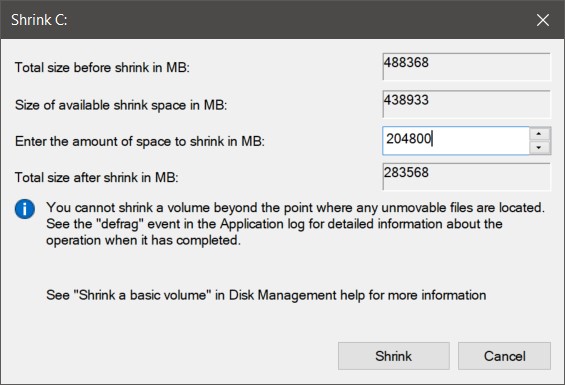
Step 3: Split the Single Partition
We need to split the SSD from one partition to two partitions to create an unallocated partition. Follow the steps given below:
1. Right-click on the single partition(Usually C Drive) and click shrink Volume.

2. Enter the amount you want to shrink and click shrink.
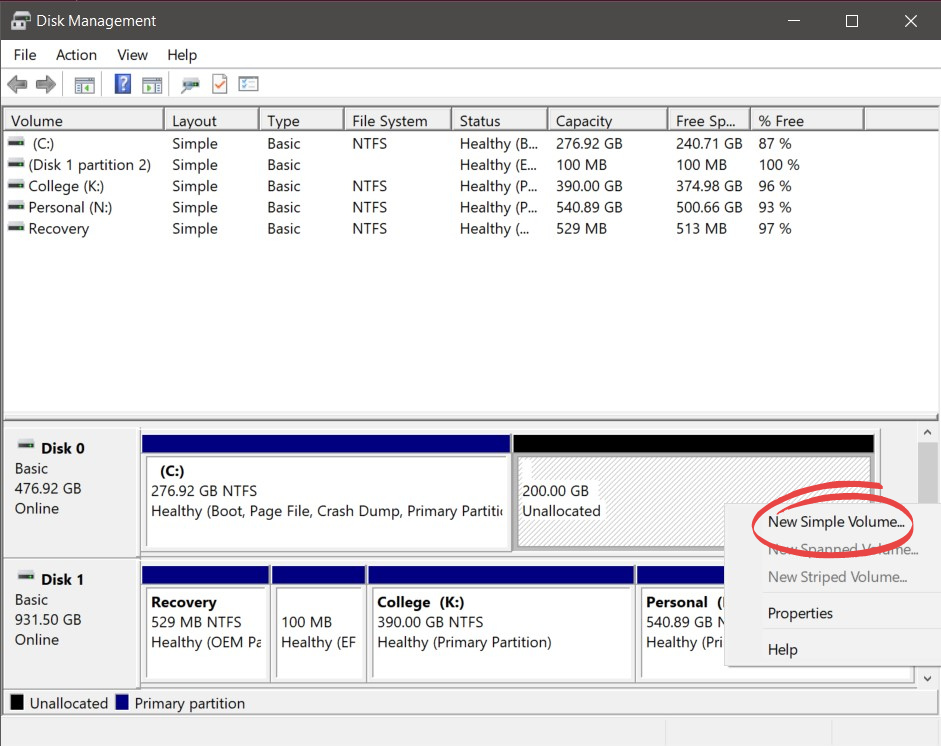
Step 4: Create a Partition or Drive
After initializing or resizing your Single Partition SSD we will be creating a new Drive. We can also create multiple partitions from a single partition. Follow the Steps given below:
1. Right-click on Unallocated space to create a New Volume.
2. Click on New Simple Volume
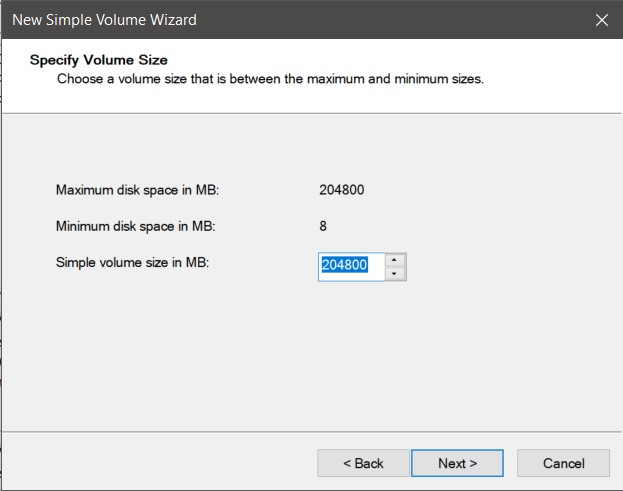
3. Once the New Simple Volume Wizard interface is opened, click “Next”.
4. Enter the amount of size for New Volume and click Next.
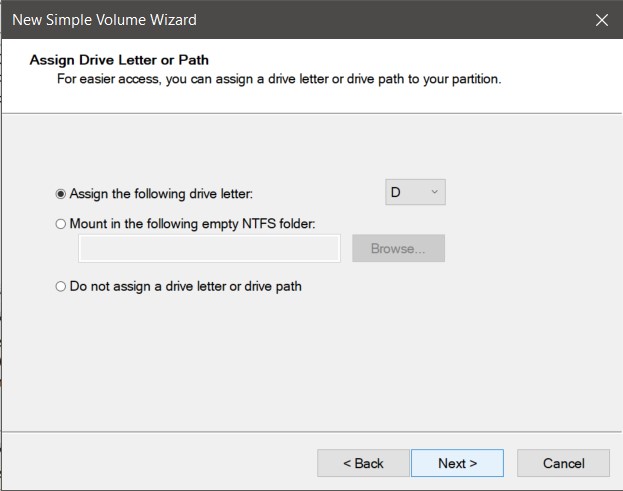
5. Assign the Drive letter and click Next.
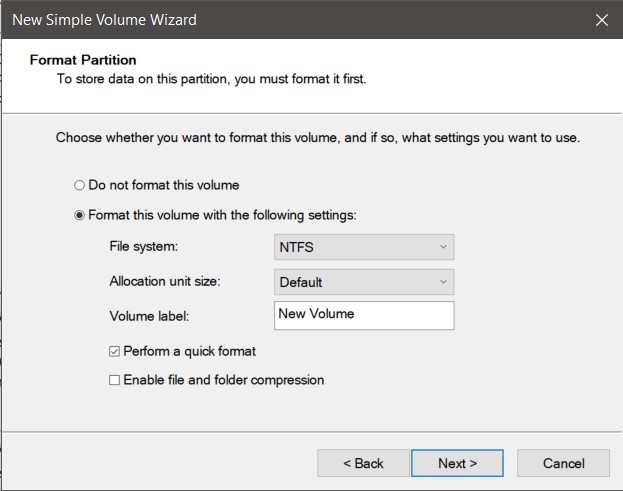
6. Tick on “Format this volume with following settings” and then set the file system as NTFS and set the volume label, Click Next.
7. Click Finish and Wait for the Partitioning process to complete.
If you want your new Drive to have a Fat32 File system follow the step-by-step guide below.
Step By Step Guide for Making A New Drive in Fat32 Format
FAT32, short for File Allocation Table 32-bit, is a file system developed by Microsoft. It extends the original FAT16 file system, employing a 32-bit file allocation table for disk space management. Known for its broad compatibility with operating systems like Windows, macOS, and Linux, FAT32 continues to be favored in specific applications where simplicity and cross-platform adaptability take precedence over advanced features. For this operation, we will use partition software.
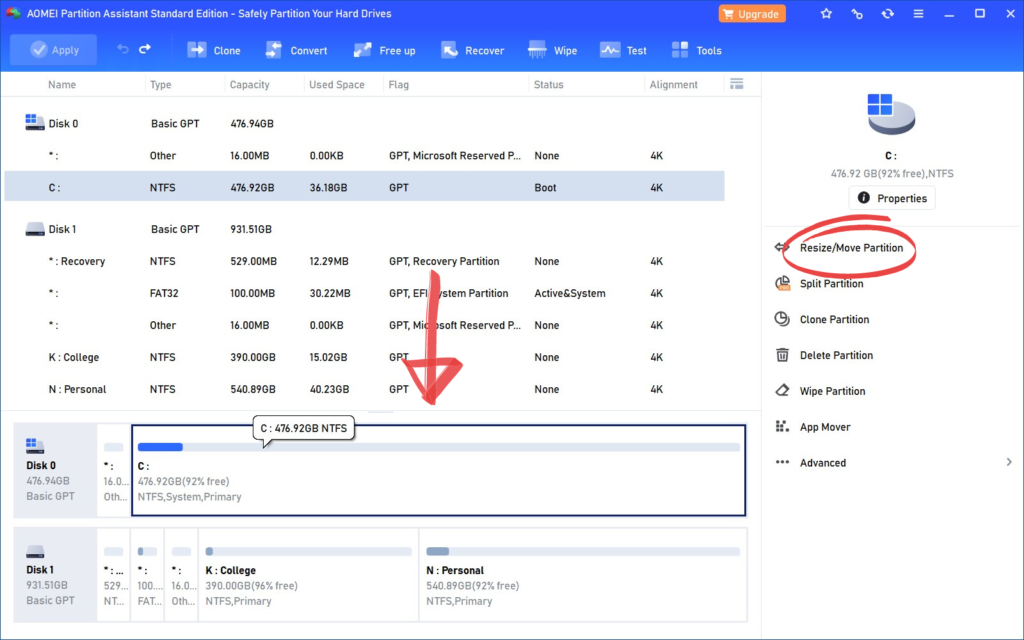
1. Download and install AOMEI Partition Assistant
2. Open it and select the partition you want to split.
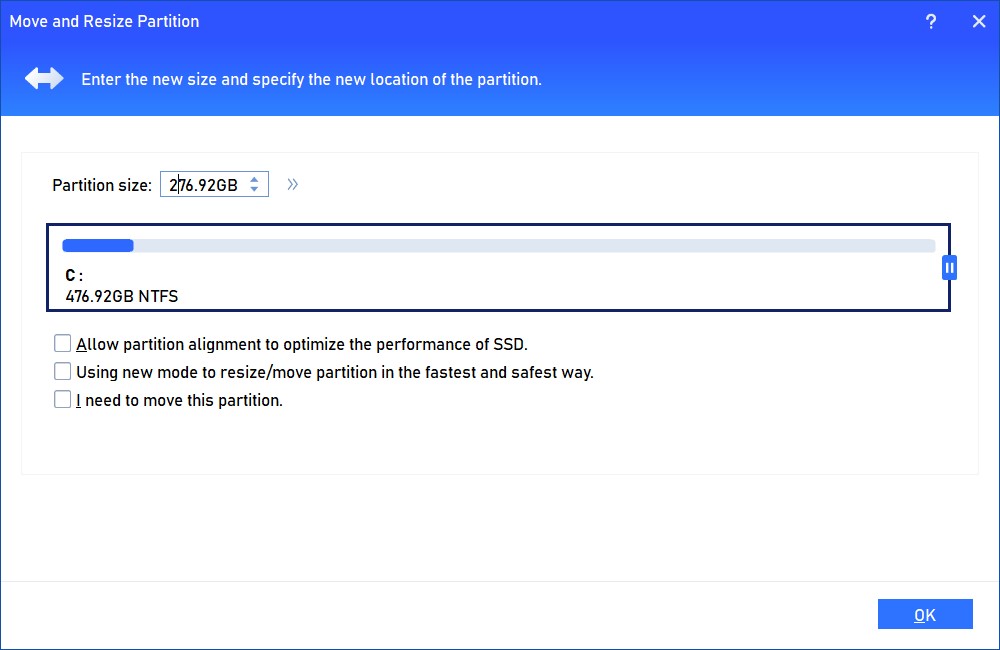
3. Click on Resize/Move Partition.
4. Enter the partition size you want to be left and click OK.
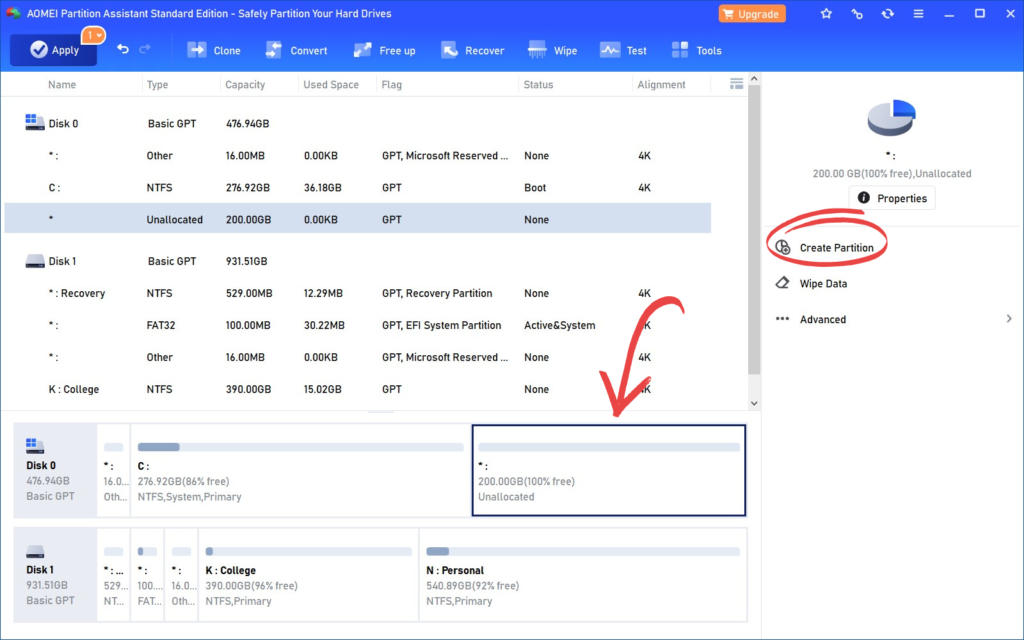
5. Now click on Unallocated Partition and then click on Create Partition.
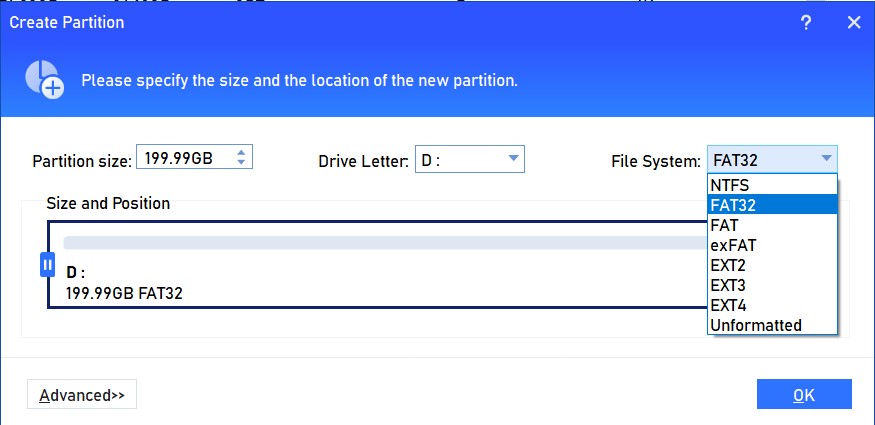
6. Assign the Drive Letter choose the file system as FAT32 and click OK.
7. Click on Proceed and Wait for the partition process to complete.